I was wondering what else to use the Assembly Tab Braid on, and thought of baby books. If the double rows of yo were extended, there would be lots of spaces to add simple book pages.
A knitted baby book, full of chewable and washable pages! Knitting anything for babies is fun, but a stashbusting, colorful project? Fun all around:
The knitter uses up bits and bobs of yarn
The baby learns colors, patterns, textures and turning pages
The Parents do have one more thing to look after, but depending on yarn choice, they can throw it in the washer and baby won’t grow out of it.
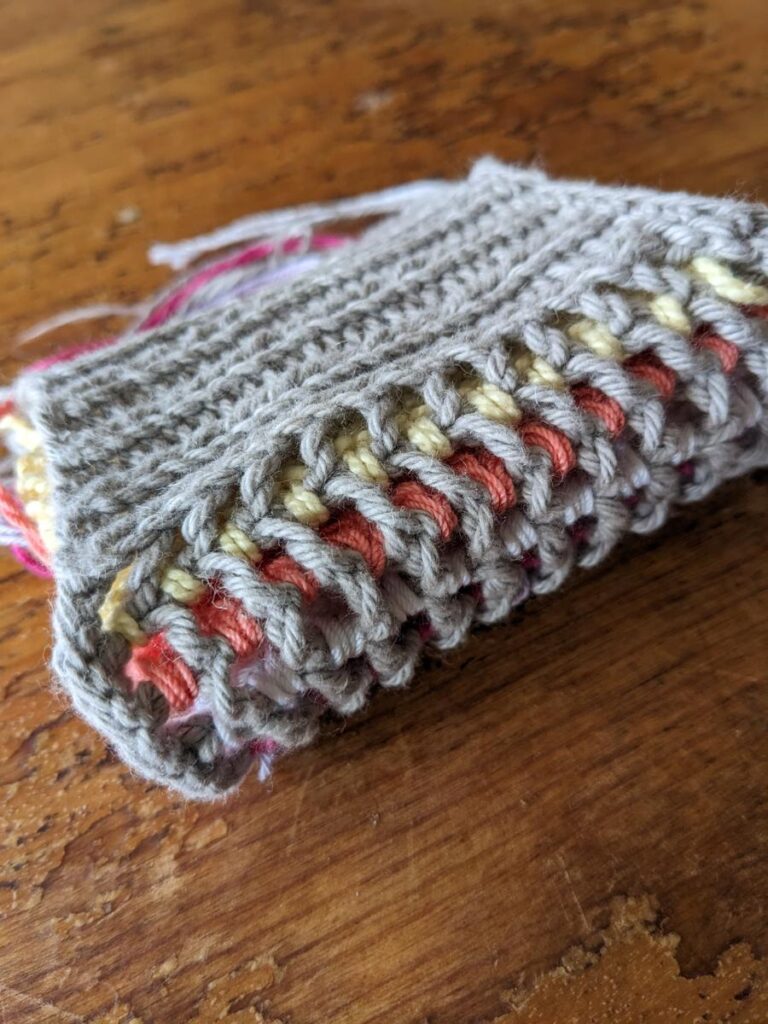
Fiber Considerations
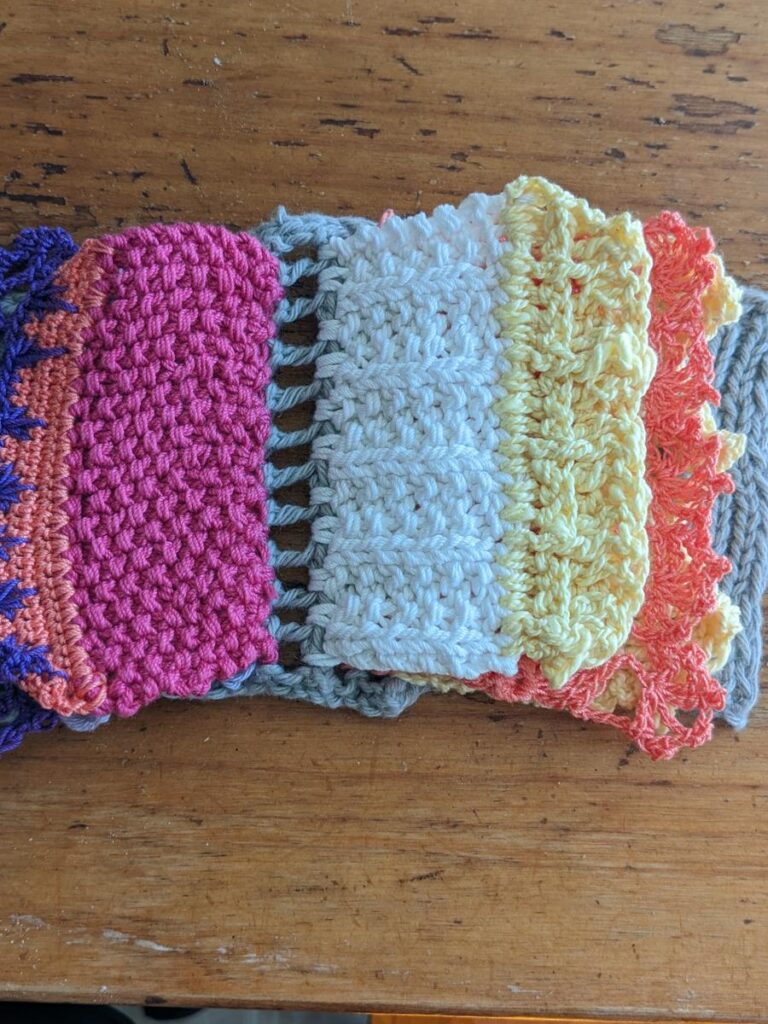
Gather yarns. They should be the same fiber, they should have the same laundry instructions (be kind to the parents, superwash or cotton/linen machine washable. The poor dears are about to be sleep deprived). They should be near-ish to the same category of yarn weight. Of course you can double up fine yarns and use them with thicker ones.
I recommend left overs.
Experiment with color! At the arrange and re-arrange balls of yarn stage, you can learn so much. Just make your final selections are made in natural light.
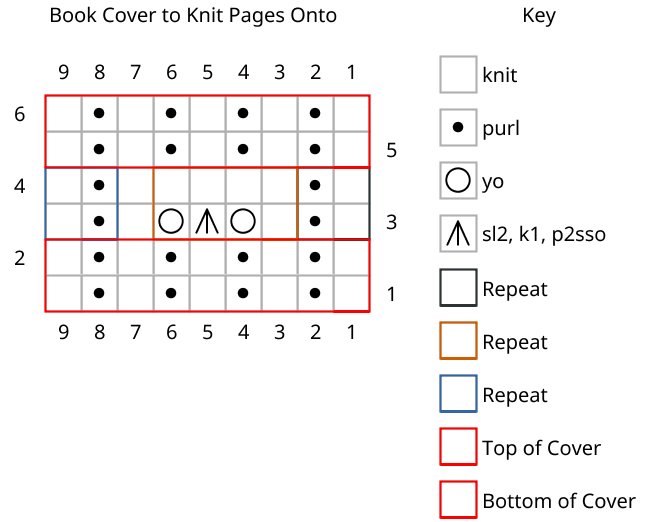
Repeat rows 1 and 2 until the bottom of the book cover is the desired height.
Row 3: *K1, p1 ; work from *, *k1, yo, sl2, k1, p2sso, yo ; work from *, k1, *p1, k1 ; work from *. Row 4: *P1, k1 ; work from *, p5, *k1, p1 ; work from *.
Repeat rows 3 and 4 until the holed section is the height of the desired page.
Row 5: Repeat row 1. Row 6: Repeat row 2.
Repeat rows 5 and 6 the same number of times that rows 1 and 2 were.
OK, Chris, I get the gist, but how many stitches do I cast on? You surely do not mean 9.
Correct!
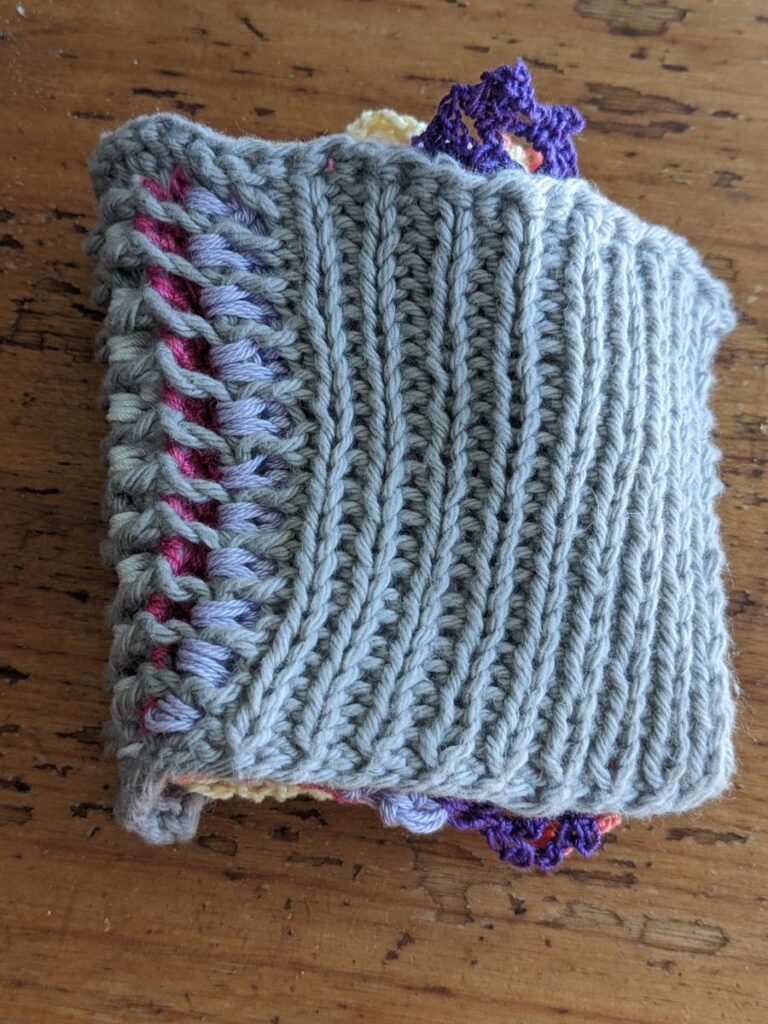
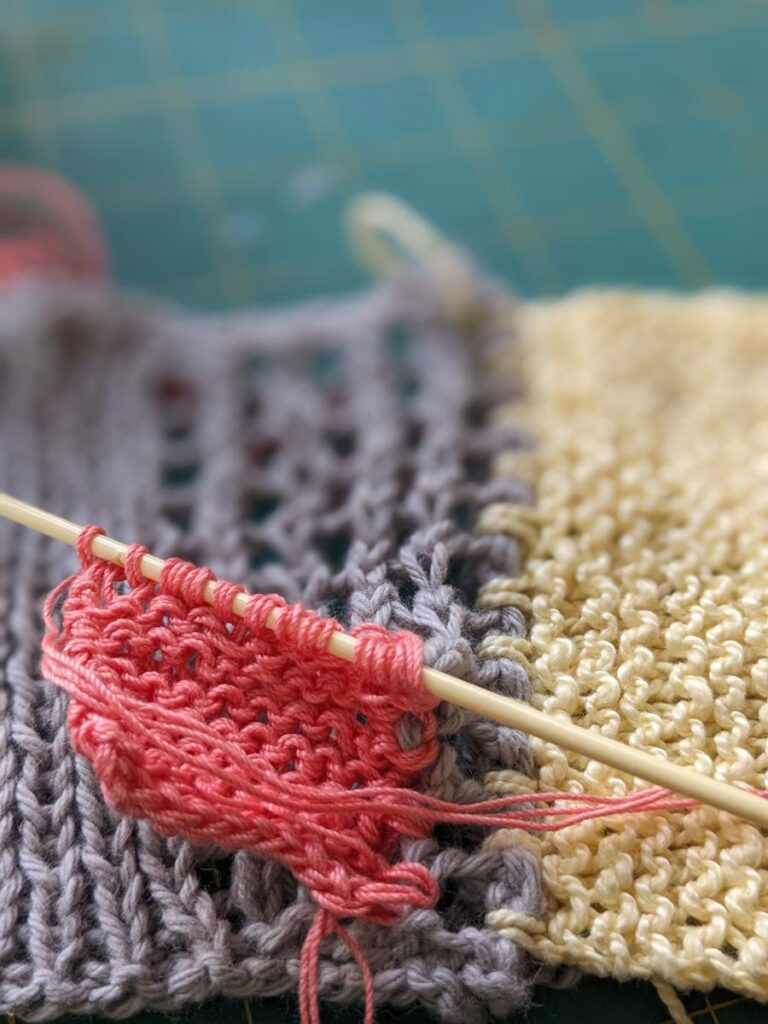
It is going to depend on the gauge of your yarn, and the size of the book you want to make. With one of your larger balls of yarn, cast on approximately 10 inches/ 25 cm worth of stitches and work it in 1/1 ribbing the height of the bottom of the cover page before the inner pages start. The fabric should be stiff, but not hurt your hands. Adjust the needle size as needed (yes, I do mean start over if you have to.) I used a grey yarn because I had lots of it, and it would cooperate with all the other colors I wanted to play with.
Then fold it into a book shape and see how many of the sts should be the * k1, yo, sl2, k1, p2sso, yo; rep from * k1 for the spine. Each pair of yo will become a page. Make the ribbed cover pages have the same number of stitches.
Work Rows 3 and 4 until the spine is the desired length of the book.
Work the same number of rows of ribbing as on the bottom of the book to encase the pages.
Two ways to add pages
The first way is to pick up and knit the page from the double yarn overs:
Fold the book cover back so that the first two rows of yarn overs are visible. *Insert the needle into the first pair of holes, draw up a loop, yo; repeat from * until the last pair of holes, insert the needle into the last pair of holes and draw up a loop. Turn.
Picking up stitches in the yarn over holes is just like using Assembly Tab Braid.
Knit the page: use a texture that is non curling like ribbing, seed stitch, garter stitch or be bold and experiment. Pull out your stitch dictionary or head online for inspiration. Bind off in a Goldilocks tension (not too tight, not too loose) and either weave in your ends now or after blocking, depending on how you roll.
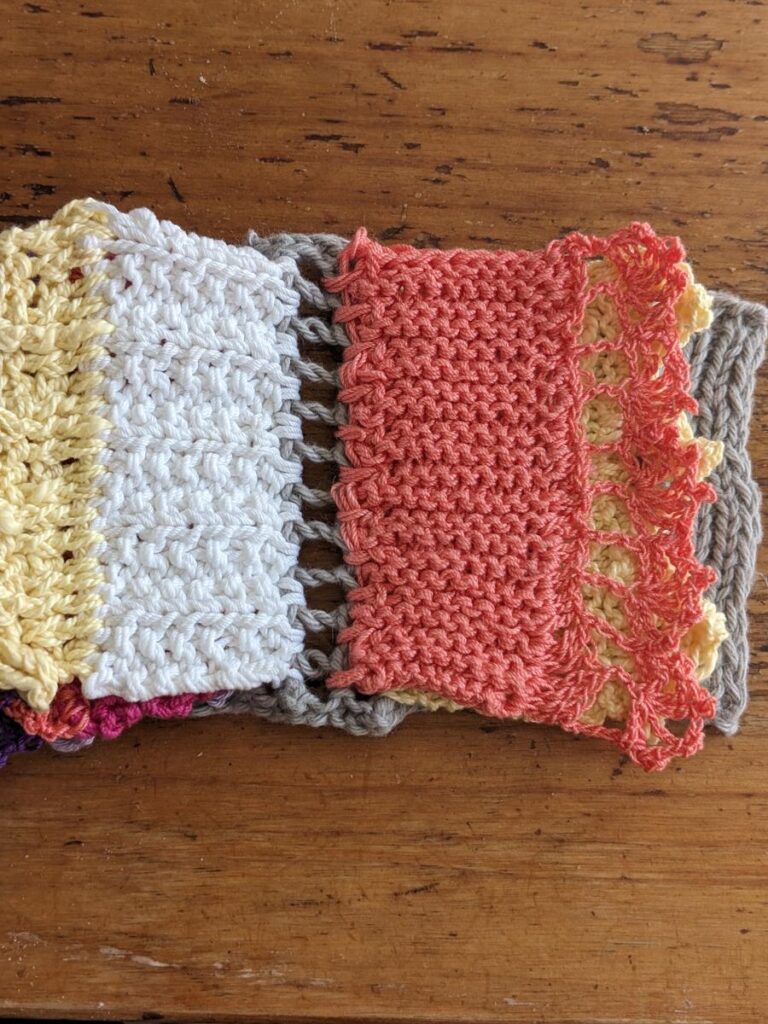
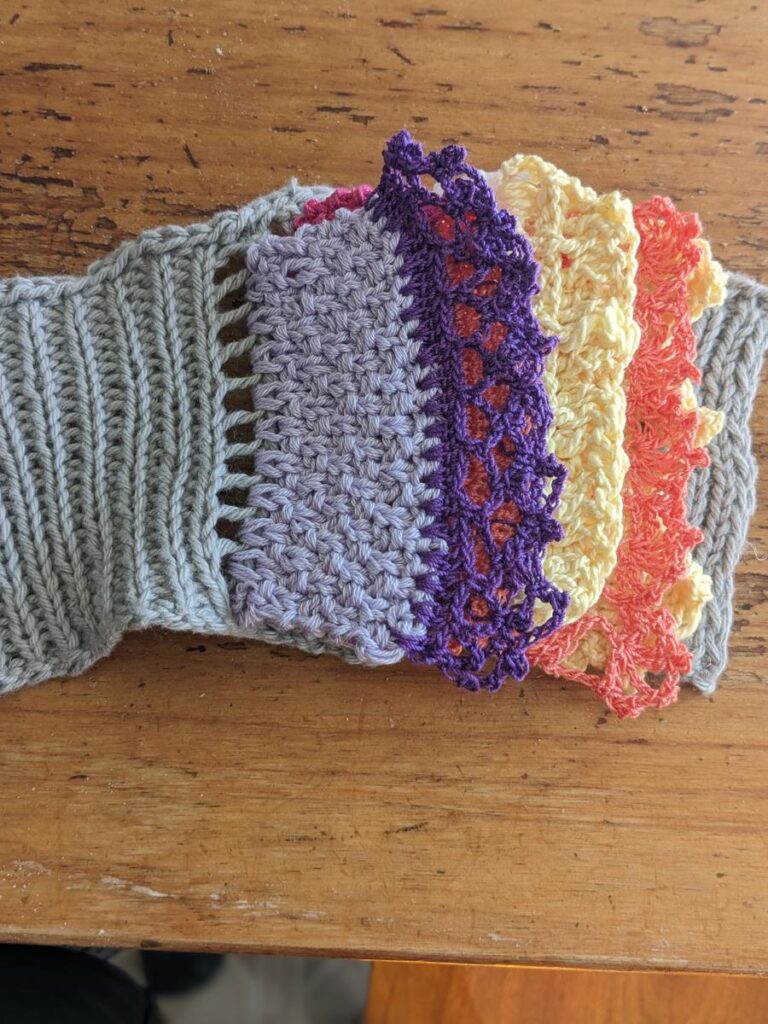
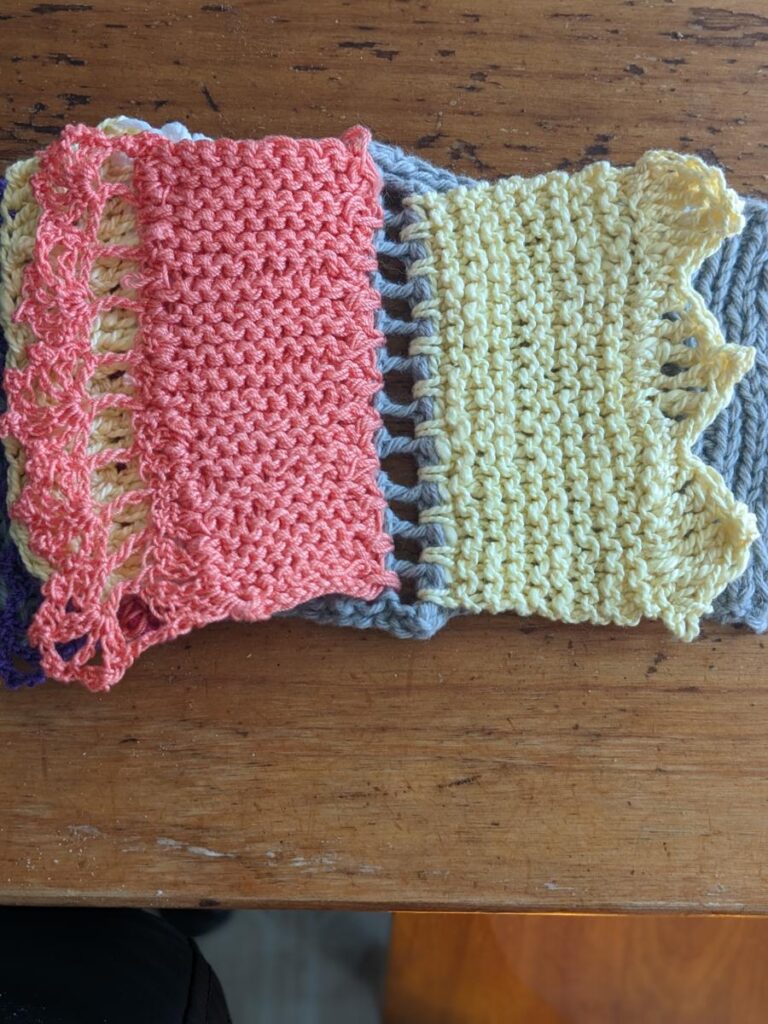
The pink and white pages above were added this way, My needles didn’t get stuck on other pages because I could fold them out of the way.
Knitting On Pages like an Applied Edging
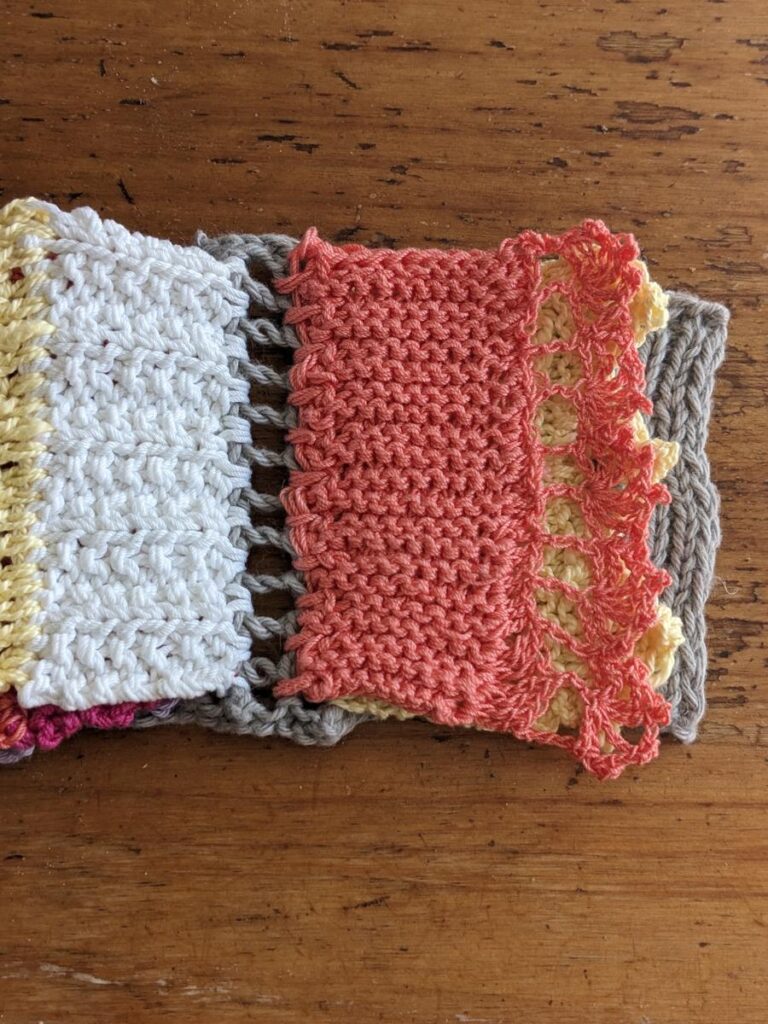
The second way to add pages is what I used on the peachy-orange page above. I applied it like an edgeing.
Cast on the bottom of the page for the stitches that look like the right number to be the width of a page. Fold the book cover out of the way, *insert the needle into the two yarn over holes, and draw up a stitch. Turn. Yo, k3tog, continue in pattern with whatever stitch you are using on that page, I used garter. Work the next two rows without connecting to the book cover at all, this will even out the height of the pages. Repeat from *. Allow an extra stitch at the spine side for the connections if you are using a fancy pattern. An edging with scallops on the turning side would be cool!
From the spine of the book cover, both picked up and applied pages look the same.
I did find that this method tends to get my needle stuck in other moving parts, and as I was making short, tall pages, there were a lot of row turns. If you make your book more square, it evens out.
Some stitches just look better sideways, and I wanted you to know about applied edges.
Adjustments after laundry (gasp!)
When I laundered my book, my inner pages shrank, and my book cover grew. At first I was sad, but then I realized that I’m not into minimalism, and probably my cousin’s new baby isn’t either.
So I added colorful crochet edgings along the top and fixed the proportions. I usually do choose fudging over frogging.
How about you?
Future Variations?
Now, for a TRULY USEFUL BABY BOOK IDEA, I should show you how to take the swatches you have already made, and bind them into a book. In the process of playing around, I actually did figure this out!
But I haven’t taken any photos, so I’m not ready to blog this. I will say, as you are making swatches for your projects, make them same approximate size, and either put the last row of live stitches on a waste yarn, or a stitch holder, or bind them off with the Picot Bindoff that needs a better name. That way you will be ready when I am.